The card for today displays rich orange and pink tones, almost replicating the look of fire in my opinion. So let's begin...
I started of with a Neenah Solar white cardstock panel measuring 3 3/4 by 5 1/4 inches. I then used Dylusions Ink Spray by Dyan Reaveley in the colours Lemon Zest, Squeezed Orange and Bubblegum Pink. I kept the spray about 8 inches (20cm) away from my project. I mainly used the first two colours on the panel and added the pink last. I sprayed on very lightly the pink to form "droplets" of colour, so you can see its not over powering the card. Afterwards I used Walnut Stain Distress Ink with a blending tool to darken the edges .
I stamped an image (Tim Holtz Flourish 2 rubber stamp) in Versafine Onyx Black on the top edge of the panel. I then heat embossed Liquid Platinum by Ranger for my sentiment stamp. I used the "happy birthday" sentiment from SimonSaysStamp Handwritten Borders stamp set and added silver and grey washi tape to the bottom of panel. To finish of I mounted the panel onto black cardstock folded down to 4 by 5 3/8 inches using foam squares.
If I could improve on the card, I would have rather embossed in black so that the sentiment stands out more. But I'm quite happy with how this turned out with the colour combinations I used.
Let me know what you think of the card!
Showing posts with label Distress ink pads. Show all posts
Wednesday, 20 August 2014
Tuesday, 19 August 2014
SYS2 Card 2
Hi Everyone,
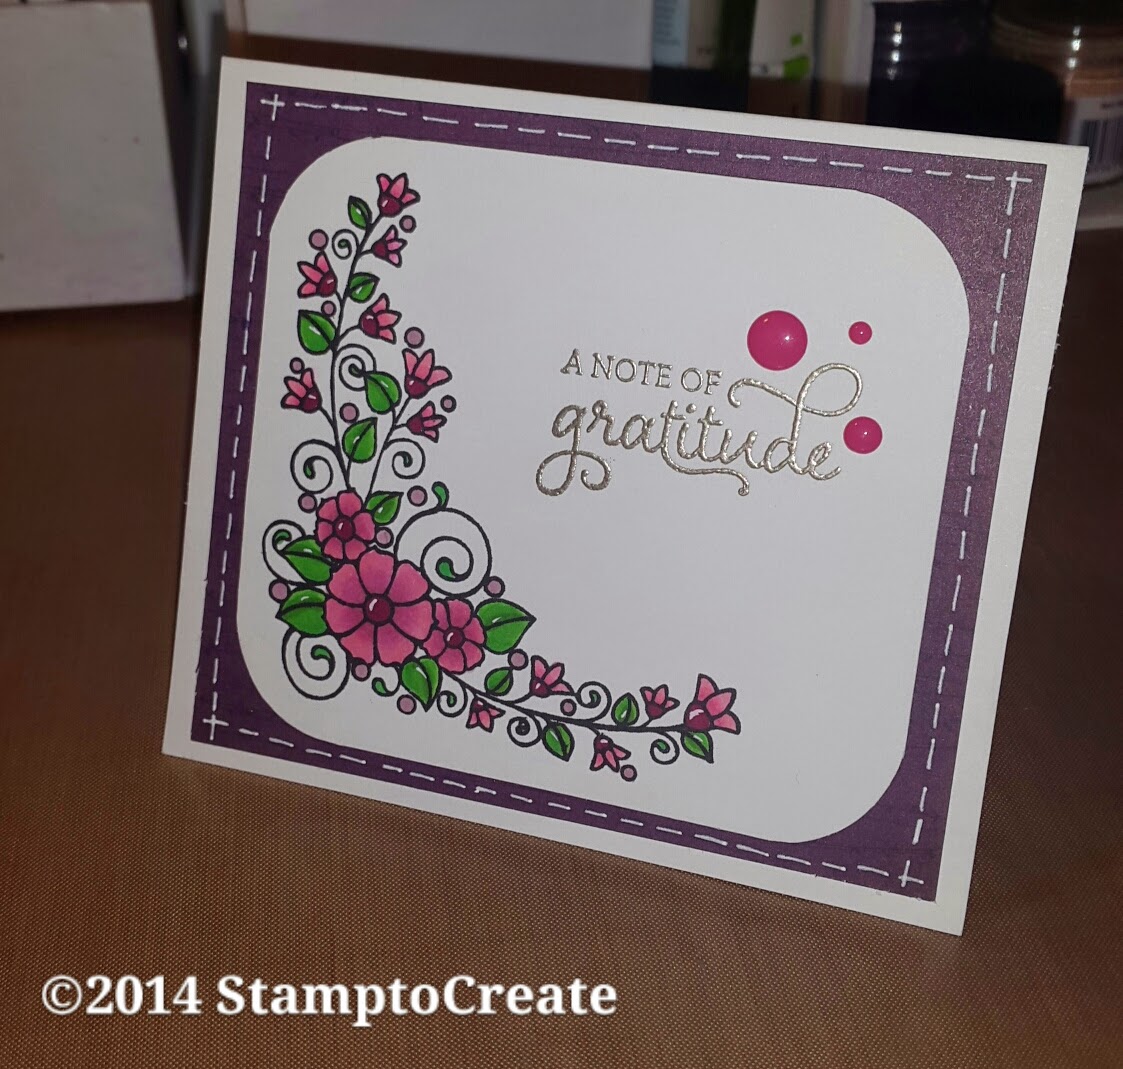
Today my card is a top folding card with beautiful pink and purple tones...love these colours!
For the panel and base I used Neenah solar white cardstock 80lb cut to 3 7/8 by 3 1/2 and folded down to 4 1/8 by 4 1/4 respectively. I stamp an image from Taylored Expressions Notable Blooms stamp set using Tim Holtz Distress Ink pad in Black Soot. I then coloured the image using Copic Ciao markers. Unfortunately I didn't keep a track of the colours I used but pick a few shades similar to these if you want to replicate the same colour scheme.
I then stamped a sentiment from the same stamp set using clear Emboss it by Ranger and then heat embossed Liquid Platinum embossing powder also by Ranger. I rounded the corners of the panel and mounted it onto a 3 3/8 by 3 7/8 purple patterned paper from Basic Grey's Wisteria paper pad using foam squares. I then used glue tape to mount the entire panel onto the base. To finish up the card I used a white gel pen to add some highlights to the image and stitching on the patterned paper. I also added 3 enamel dots from Studio Calico's Color Theory.
Hope the card inspires you!
Please comment and link back to your ideas.
Today my card is a top folding card with beautiful pink and purple tones...love these colours!
For the panel and base I used Neenah solar white cardstock 80lb cut to 3 7/8 by 3 1/2 and folded down to 4 1/8 by 4 1/4 respectively. I stamp an image from Taylored Expressions Notable Blooms stamp set using Tim Holtz Distress Ink pad in Black Soot. I then coloured the image using Copic Ciao markers. Unfortunately I didn't keep a track of the colours I used but pick a few shades similar to these if you want to replicate the same colour scheme.
Hope the card inspires you!
Please comment and link back to your ideas.
Sunday, 17 August 2014
SYS2 Card 1
I created this card using neenah solar white cardstock folded down to 4 1/4 by 5 1/2 as a base. For the panel I used the same cardstock, powered it first and then white embossed several times an image from Paper Smooches Botanicals 2 stamp set.
I took that same image and then using Walnut Stain Distress ink pad, I stamped dark shadows in the background. Ink will get onto the white embossing since no masking was done on the image... I'll sort that out at the end. Next using Distress ink pad in Vintage Photo and a mini blending tool, I started distressing the panel from outside towards the centre till the entire panel is covered. Thereafter I used Walnut Stain to darken the edges using the same technique.
I stamped in Versafine Black Onyx ink a sentiment from Paper Smooches Pretty Phrases stamp set. I then mounted the panel onto the base using foam squares and added stitching to the edges using a brown fineliner pen.
I used a wet tissue to gently wipe away the excess ink on the embossing to expose the bright white colour of the image.
Hope you liked the card for today.
Be sure to comment and share your ideas!
Subscribe to:
Posts (Atom)